Welcome to the Clay Studio
Today you will learn about the Clay Studio! We will go over expectations for Set up, Clean up and Studio Time.
What is Clay
Clay is a type of fine-grained natural soil material containing clay minerals. Clays become soft when wet but becomes brittle when dry and hard after firing. It's an art material that comes from the EARTH.

Let's look at how artists work with Clay and learn some Ceramic hand building techniques and process. When you work with clay using your hands it is called Hand Building.
Slab
Roll out clay and cut into shapes. You can cut a Slab. Make marks and texture into the surface. And press and shape the slab into a form.
Use a mold to create a form
| Don't make the slab too thin or too thick |
|

Here are a few more examples of SLAB projects
Coil
a long pliable cylinder/roll of clay.
You can get very creative with the way you roll coils into arches, spirals, donuts, twists and braids. You can cut coils into long and short lengths and place the horizontally and vertically.


Coils can be simple or intricate
Some artists like the coils to be visible or be part of their design. Other artists like to smooth away out the coil texture.
Pinch Pot
Pinching is a basic pottery technique, Making a pinch-pot is pressing the thumb into a ball of clay, and drawing the clay out into a pot by repeatedly squeezing and pressing the clay between the thumb and fingers
How about Attaching feet or a handle. Make a lid | |

Turn that pinch pot upside down--think of the possibilities!
What if you add coils and texture to your pinch pot
| |
Slip and Score
Don't SKIP THE SLIP
Could you combine a COIL, PINCH POT and a SLAB?
Think of SLIP like your CLAY GLUE
|
Do you notice a clay coil attached to a pinch pot? |
Texture
Using tools and materials to press markings into the clay surface.

Drying
clay must dry and be fired to become hard and waterproof. Once fired, water will not soften the clay.

Firing
a KILN is an oven for baking/ firing pottery. It gets hotter than your oven at home.
Things BREAK!

If your clay is too thin or too thick it can break. Slip and Score to make sure attachments stay in place.
Accidents can happen...but lessen the chance of accidents by paying attention and not playing around.
Glazing
Adding color to your fired clay often includes glaze although other materials can be used. Glaze can can be used to color, decorate or waterproof an item.
You will apply glaze like paint. Brush on 2 coats. Same color, same place, twice.

NO glaze the bottom of your work. if you get a little drop wipe off with a sponge.
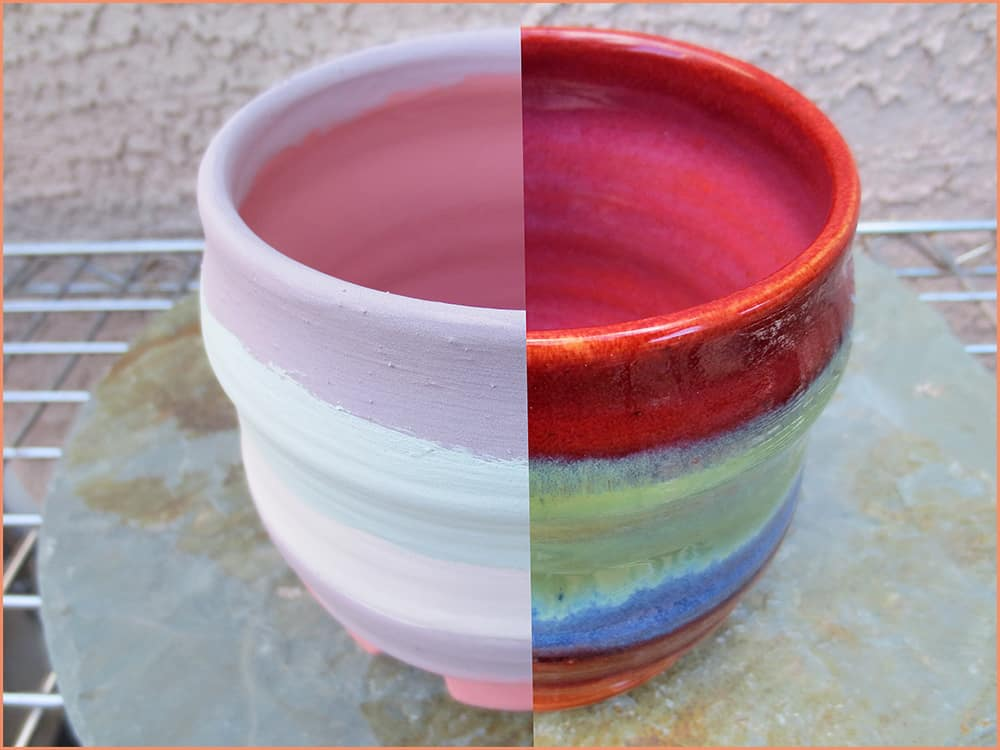
Before and after the second firing in the kiln
Often Glaze will make your work shiny.
| 
|
Giving your Ceramic art a little EXTRA!plan ahead for holes to hang your work with a wire or add beads.
Meramec Clay Studio 


