Showing posts with label pinch pot. Show all posts

Friday, April 8, 2022

Clay Studio --Stretch and Explore

So, you can make a PINCH POT and know a few other ceramic techniques! 

Now What?

  
Stretch and explore those skills

ashcanartworks

What if you join two pinch pots together?   Look at the texture lines and marks in the clay!  If your pinch pot is too small pinch more and next time get a bigger piece of clay.


Now let's try that in the opposite direction joining the rims together.  Add several tiny round pieces of clay inside and it will rattle.

don't forget to add ONE NEEDLE HOLE!! when enclosing air in clay

Slip and Score and then smooth where they meet and create a seam.

Add FEET!

Here's a similar pinch pot with a face and 3 coil legs.

7 Pinch pot planters ideas | pinch pots, clay projects, planters


Look at the possibilities


You can roll coils to make spiral foot, long or short legs. Or a coil into a ring to make a coiled foot ring.  


Don't forget to score and slip


Maybe you will add texture to your Pinch Pot.

Pin on Ceramics

Texture can really add interest to your CLAY art

      
Carefully press a tool into the clay to leave interesting marks, patterns and designs


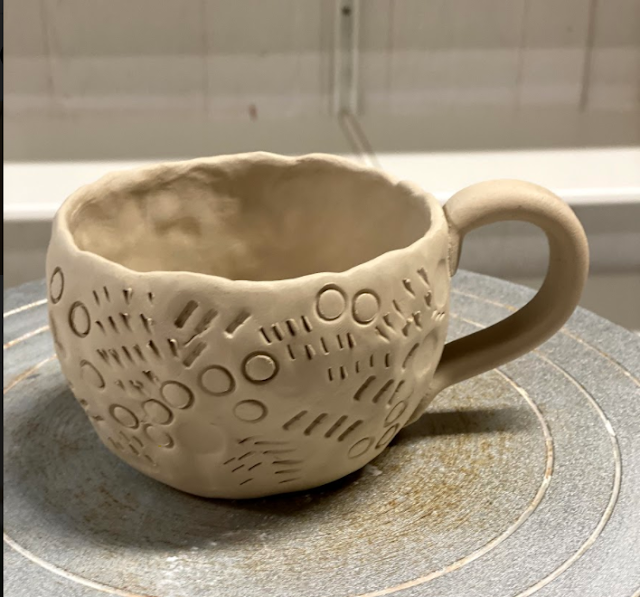
Compare these two projects.  Sometimes texture can make all the difference

Look at these two fish.  One has texture and pattern and one is smooth.  One is not better than the other.  Which is more interesting to look at?


Here is a similar idea with a different animal cut out of a slab.
Roll out a slab and cut into a circle.  ADD TEXTURE.  fold in sides to make wings.


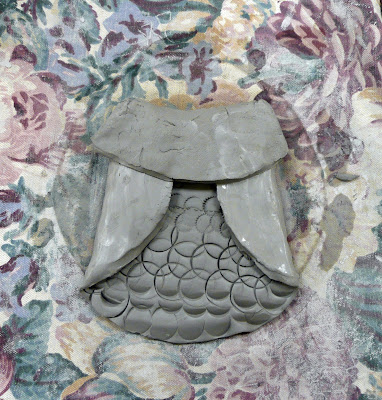
Fold the top downward to make the head.  Add Details.  Slip and score a beak.


How can you combine another studio with your clay art.  Let's look at how you can make clay pendants for jewelry.

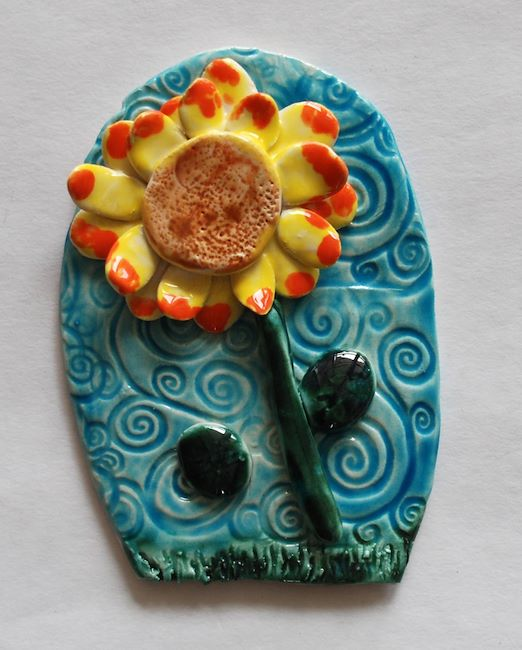
Roll a slab and cut the outline or contour line


Add texture and design.  Lastly don't forget a hole for a string you will add later.

Make two small charms and now you can make earrings.


Don't forget COILS

coils are a great technique to use in the Clay Studio

slip and score is so important with coils


Add texture on your coils


and more SLAB ideas


Slab tile houses and Name plates.  What do you need to add if you plan to hang this up?


Clay portraits.  SLIP and SCORE


Troubleshooting Clay Studio.

My clay is too soft and is collapsing.  -- Let is sit for a bit and dry to make the clay more firm.


I slipped and Scored but my pieces of clay didn't attach----did you use slip?  did you make enough scratches into the clay?  did you push and wiggle the pieces together.


My glaze isn't very dark or bright.  --did you use 2 coats?


*Size of clay = size of your art

*you can write your name with a pencil

*demo making a hole


Thursday, March 17, 2022

Glaze --leveling up your ceramics


Let's GLAZE!

When you have created a clay artwork you will come in next class and it will either be in the kiln, still drying or bisqued.  
look at the three stages of clay we see on the cart.


Glazing can really Power Up your work.  
The color can enhance the shape of your pottery.  You can add patterns, solid areas of color and design.

Betty Woodman was a ceramic artist.  She was known for inventive forms and how she applied her colorful glaze.  
Widewalls
Betty made FUNCTIONAL pottery and later on more decorative work.  
That means it had a function, purpose or could be used to perform a job. 
Functional meaning it could be use to drink from, hold objects, 
pour and eat off of.  Will your pottery be decorative or Functional?  
if you are going to put food or liquid in your clay artwork you will need to listen closely to instructions about GLAZE.


Glaze is the color we will use for clay.  Glazed pottery goes back in 
the Kiln for a second firing.  The glaze becomes molten hot and 
coats your work in a thin layer of glass.
The Cabinet of Glaze is to the left of the Clay Studio.


You will only remove a blue tray of glaze from this cabinet and nothing else.


Select a blue tray of glaze and bring it back to your table.  No placemat


You will need a brush for each color you use.  New color new brush. Each jar gets 
its own brush
NO glaze the bottom of your work. if you get a little drop wipe off with a sponge.


Two coats.  Same color, same place, twice.  
These glazes are not meant to be mixed.  No mixing colors.
TWIST Caps back in place.  

Rinse Brushes until water runs clear.
Return Glazes.  

Put your glazed work on the cart.  Next class you will pick up your finished ceramics.


Ceramic work goes in the kiln a 2nd firing and the glaze becomes molten and melts onto your 

pottery and creates a shiny coating.